(Compatible article number Roha II 25780)
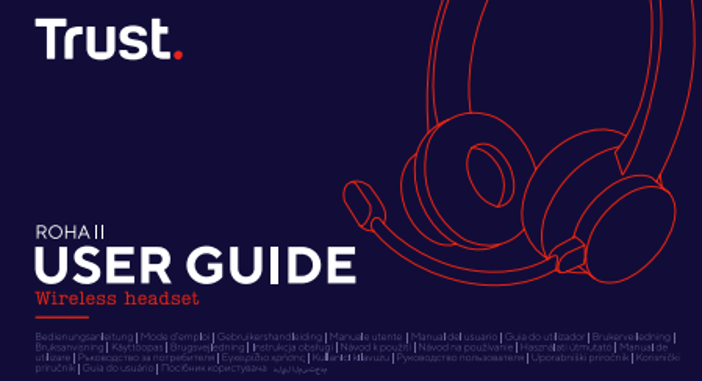
How to set up and use your Roha II Wireless Headset
This guide explains how to charge, connect and use your Roha II Wireless Headset.
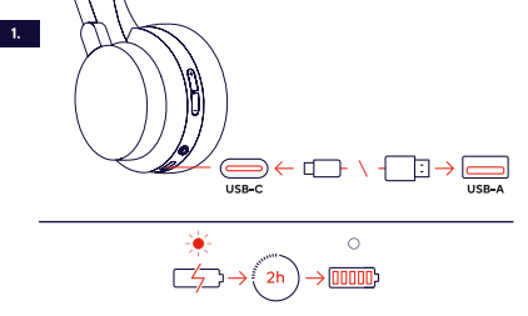
1. Charging the Headset
1. Connect the USB charging cable to the headset.
2. Connect the other end to a USB charger or USB port.
3. Allow the battery to charge fully before first use.
4. Disconnect the cable once charging is completed.
--------------------------------------------------------------------------------------------------------------------------------------------------
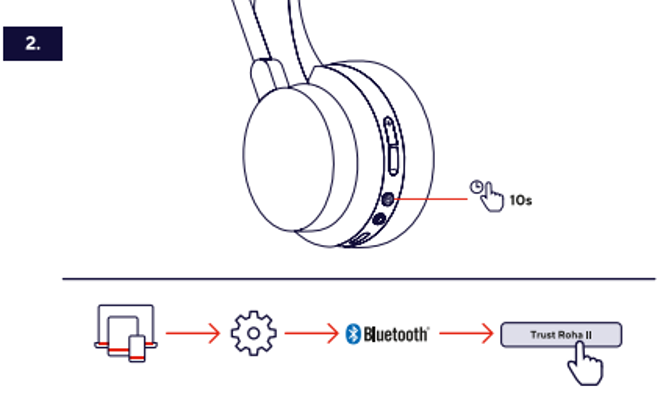
3. Connecting via Bluetooth
1. Press and hold the power button for 10 secondes
2. Enter Bluetooth pairing mode.
3. Open Bluetooth settings on your device.
4. Select Trust Roha II from the list.
5. Wait until pairing is completed.
✅ The Bluetooth connection has been successfully established.
----------------------------------------------------------------------------------------------------------------------------------------------
4. Headset Controls
The headset includes easy-to-access controls for power, volume, calls and enable/disable noice cancelation.
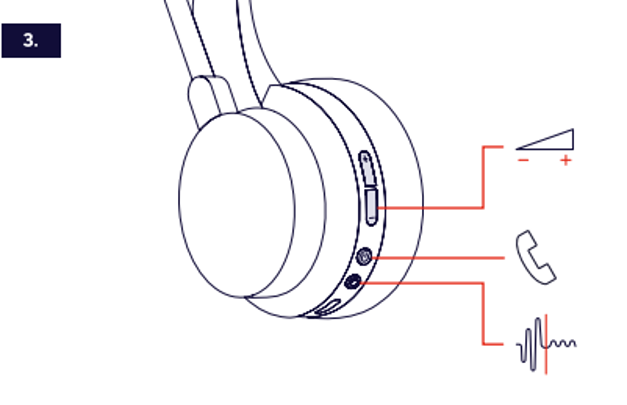
Volume buttons (+ / -)
- Press + to increase volume.
- Press - to decrease volume.
Call button (phone icon)
- Answer incoming calls.
- End active calls.
Microphone / Noise Cancellation button (waveform icon)
- The waveform icon typically indicates microphone functions and noise cancellation.
- Press to toggle the microphone noise-cancelling feature on or off.
----------------------------------------------------------------------------------------------------------------------------------------------
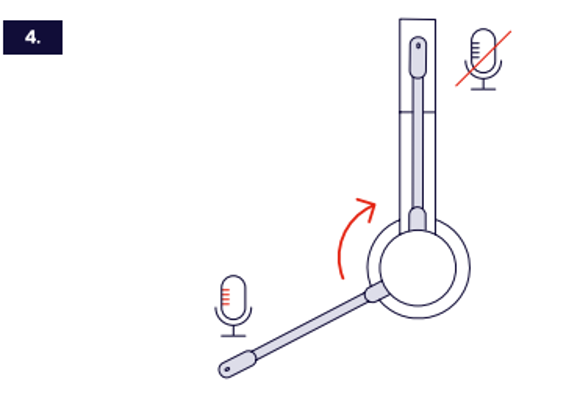
5. Microphone Boom Arm Function
Microphone Down (Active)
- Rotate the microphone boom arm downward into the speaking position.
- The microphone is enabled and ready for calls, meetings, and voice recordings.
Microphone Up (Mute)
- Rotate the microphone boom arm upward toward the headband.
- The microphone is automatically muted.
- The crossed-out microphone icon indicates that audio transmission is disabled.
----------------------------------------------------------------------------------------------------------------------------------------------
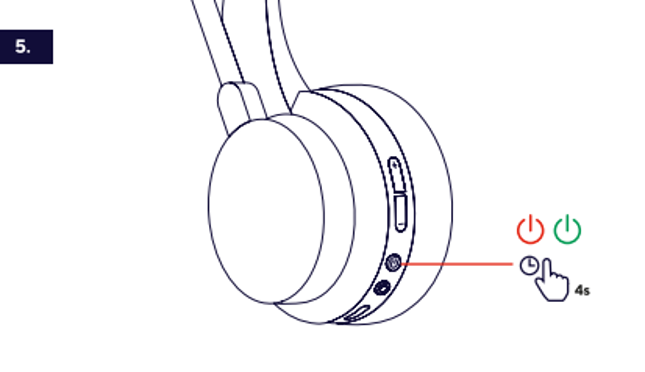
6. Power Button
Power On
- Press and hold the Power button for 4 seconds.
- The headset powers on and becomes ready for pairing, calls, and audio playback.
- The green power icon indicates the headset is switched on.
Power Off
- Press and hold the Power button for 4 seconds.
- The headset shuts down and disconnects from connected devices.
- The red power icon indicates the headset is switched off.
----------------------------------------------------------------------------------------------------------------------------------------------
7. Battery Status
• Charging: LED indicator active.
• Fully charged: Charging indicator switches off.
8. Troubleshooting
Headset does not turn on
• Charge the battery.
• Verify the charging cable connection.
Bluetooth connection fails
• Remove previous pairings.
• Re-enter pairing mode.
• Move closer to the device.
No sound
• Increase the volume.
• Verify the headset is selected as the audio output device.
Microphone does not work
• Check microphone permissions.
• Reconnect the Bluetooth connection.
Was this article helpful?
That’s Great!
Thank you for your feedback
Sorry! We couldn't be helpful
Thank you for your feedback
Feedback sent
We appreciate your effort and will try to fix the article